A filter that is even slightly too small can let unfiltered air slip around its edges. One that's too large may bend, jam, or restrict airflow. Learning to measure AC filter size correctly helps your system breathe properly and keeps replacement day simple.
You don't need special tools. A tape measure, a pen, and a few careful minutes are enough. Start with the filter you have, then confirm the opening it slides into before you buy a replacement.
Start Safely and Find the Filter Location
Most residential filters sit behind a large return grille, inside an air-handler cabinet, or in a filter rack near the indoor unit. Check the filter's edge for a printed size first, but don't treat that number as your only source of truth.
Turn the system off first
Set the thermostat to "Off" before removing the filter. This prevents the system from pulling loose dust into the return while the slot is open. Wait until the blower stops, then open the grille or access panel.
Pull the filter straight out and note the airflow arrow on its frame. The arrow should point toward the air handler or blower when you install the new filter.
Use the filter and the opening
If the current filter fits well without gaps or force, measure it. However, also measure the filter opening if the old filter is bent, missing, or seems loose.
Measure the inside edges of the filter rack , not the decorative face of a return grille. The grille may be much larger than the filter it holds. For a wall or ceiling return, remove the grille if needed and find the narrow channel where the filter rests.
How to Measure AC Filter Size Correctly
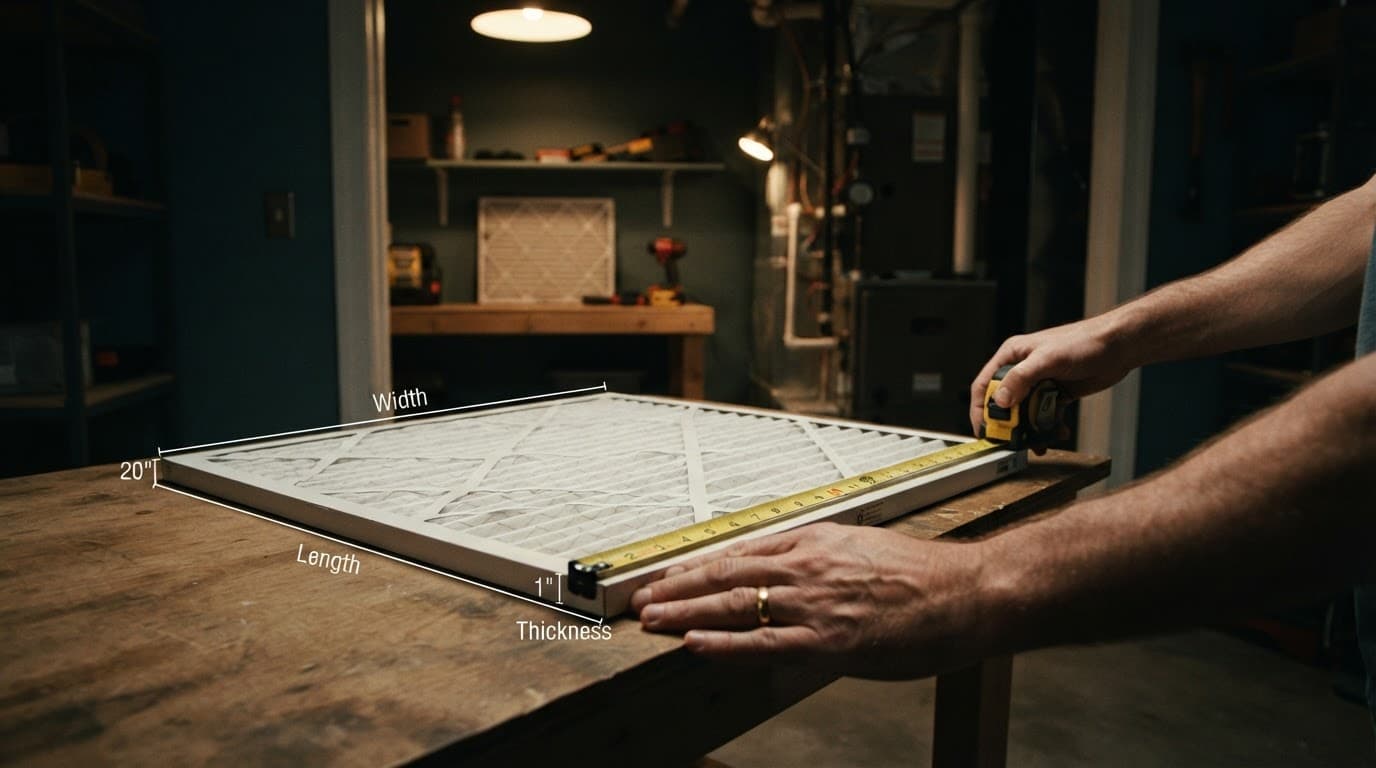
To measure AC filter size, lay the old filter flat on a clean surface. Use a tape measure with clear inch marks, and keep it straight along each edge. A metal ruler works well for thin filters.
Measure length, width, then thickness
Filter dimensions follow one standard order: length x width x thickness . Measure the longest side first, the shorter face dimension second, and the depth last.
For example, write a measurement as 15 1/2 x 19 1/2 x 3/4 inches. Don't switch the first two numbers because filters with similar face sizes may not fit the same slot.
Use this quick process:
- Measure the longest outside edge from frame to frame.
- Measure the shorter outside edge across the filter face.
- Measure the filter's thickness at the cardboard frame, not the pleated material.
- Write all three dimensions down immediately, including fractions.
A standard 1-inch filter may measure only 3/4 inch thick. Likewise, a 4-inch filter can measure closer to 3 5/8 inches. Thickness matters because the filter must slide into a narrow track and sit securely.
Measure the opening when the old filter is questionable
An old filter can sag, tear, or get compressed around the frame. In that case, measure the inside width and height of the rack. Then measure its depth from front to back.
Leave no guesswork around thickness. A filter that is too thin can rattle and allow bypass air. One that is too thick may prevent the access door from closing or bow the frame when you push it in.
A filter should slide into its track with light resistance. If you have to bend the frame or push hard, stop and recheck the size.
Actual vs. Nominal AC Filter Dimensions
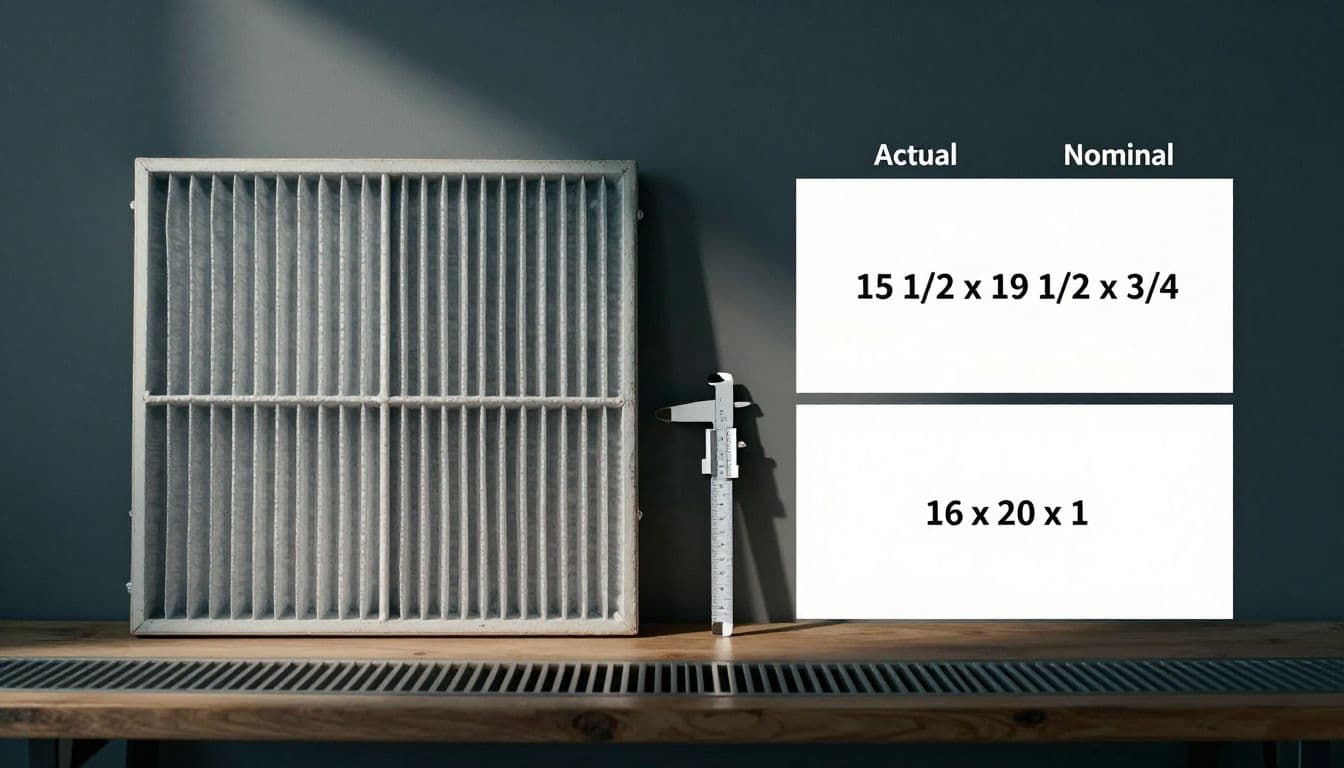
The number printed on a filter package is often its nominal size , a rounded label used for shopping. Its actual size is the exact physical measurement of the filter.
Why the numbers don't always match
A filter sold as 16 x 20 x 1 may have actual dimensions of about 15 1/2 x 19 1/2 x 3/4 inches. Manufacturers make it slightly smaller so it fits in a 16 x 20 x 1 opening.
That difference is normal. The important part is choosing a replacement with the same nominal size and a compatible actual size. Check both numbers on the package when your filter rack is tight or when you switch brands.
If your old filter says 16 x 20 x 1 but measures smaller, buy another filter labeled 16 x 20 x 1 unless the manufacturer's actual dimensions differ enough to cause a fit problem. Keep a photo of the old label and your handwritten measurements for future purchases.
Confirm the Replacement Filter Fits
Before closing the grille or air-handler panel, slide the new filter into place. It should rest flat inside the track, cover the opening, and remain straight along all edges.
Check the frame and airflow arrow
A properly sized filter doesn't buckle in the middle or leave visible gaps around its frame. If it falls forward, rattles, or slips past the track, it may be too small. If the frame creases or catches, it may be too large or too thick.
Next, point the airflow arrow toward the blower. A wall return grille usually pulls air inward, so the arrow points into the duct. At an air handler, it points toward the equipment.
Watch for airflow problems
A clean, correctly sized filter supports steady airflow. Yet weak airflow can also come from a dirty coil, duct issue, or blower problem. Review these AC filter checks before calling for repairs if rooms feel warm or vents barely move air.
Cape Coral's humidity, long cooling season, and coastal dust can load filters quickly. Follow a practical Cape Coral AC filter replacement schedule, and check the filter monthly even if it isn't due for replacement yet.
A Proper Fit Protects Airflow
When you measure AC filter size using the existing filter and the opening, replacement shopping becomes far less frustrating. Record length, width, and thickness in that order, then compare actual and nominal dimensions before buying.
A filter should fit snugly without force and point toward the blower. If the size still seems unclear, the system has weak airflow, or the filter gets dirty unusually fast, Contact Us to schedule service with a local HVAC professional.